Recording a violin might sound challenging but in reality, it’s not as hard as you might think.
Although it differs from recording other instruments like guitar, you can make it happen with a little guide.
You may have never recorded violin I will try to help you to do it with minimal effort.
Also, knowing how to record different types of musical instruments will make you a more professional recording engineer.
How To Record Violin At Home
To record violin at home with your home recording gear, I have created this little guide which will give you all the things main things you need to do.
1. Install Fresh Strings

The first thing to do before recording a violin is to install new strings and it’s not specific to violin only.
No matter what stringed instrument you try to record, first you need to install new strings.
For example, I always install new guitar strings when I’m recording electric or acoustic guitars. So, you need to do it for the violin too.
New strings give instruments a fresh sound and new life which sounds much better in recording than old strings.
However, if you have changed strings a week or two ago, you may not need to install new ones. But I recommend changing a month or more old strings.
So, always install fresh strings before recording and here you can find awesome strings for violins.
2. Choose Your Recording Device
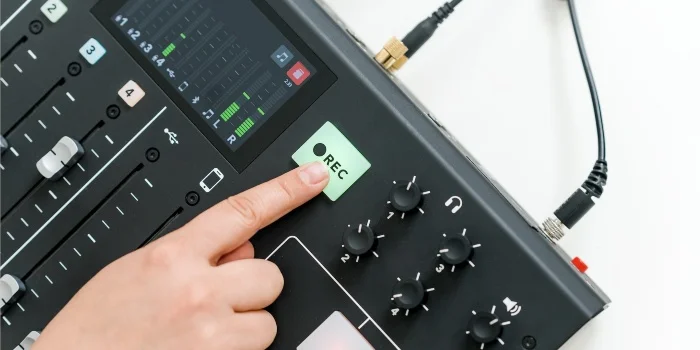
Next, you need to choose how to record a violin and what gear or recording device you want to use.
In a home recording situation, perhaps the best solution is a USB audio interface because it makes everything much easier.
And then you will need some kind of DAW to record the audio through the audio interface.
Many great DAWs offer all the features you require to record professional-quality audio in a home studio environment.
You can use a free DAW and it will work perfectly or spend some money on the more advanced digital audio workstation.
As you may know, I love Reaper and recommend it to anyone who owns a home recording studio. It’s affordable, easy to use, has amazing features, and free plugins, and rarely crashes.
So, after choosing the recording device and a DAW, it’s time to pick a more important gear – a microphone.
3. Choose Microphones

When it comes to microphones for recording, you have a huge option to choose from.
Different types of microphones have different purposes – some work with guitars, some are great for vocals, and so on.
And you can use any kind of microphone to record violins such as a condenser mic or a dynamic mic and it will give a great result.
But for the best results, I suggest using a combination of microphones because the recorded sound will have more depth and it will be more interesting to hear.
For example, the main sound source will be a dynamic microphone and use a condenser microphone as a room mic.
Also, you can implement a clip-on mic which will be installed on the violin and pick up the specific sound.
A three-mic combination will give you the best results but if you don’t have many options, use two or even one.
However, if you use an electric violin, just plug it into the amp and record. You don’t need to use a microphone.
4. Properly Mic A Violin
However, no matter how many or how awesome mics you use, the most important thing is to use them properly.
If you have read my post about acoustic guitar mic placement, you know how important it is for good recording and the same goes for violins.
So, for the best sound, I recommend using three types of mic – a clip-on, dynamic, and condenser.
Install a clip-on mic and the mic should point the spot behind the bridge, between the strings and the violin body. This will pick up the specifically focused sound.
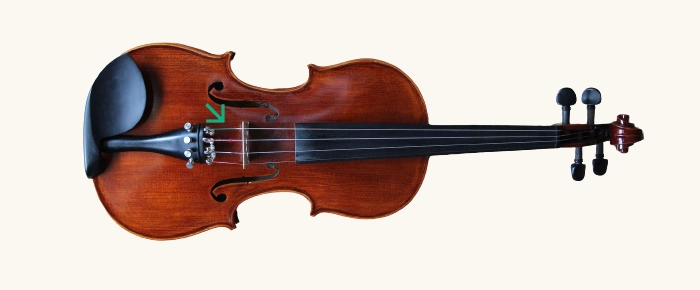
Then you will need a dynamic microphone on the mic stand. You should stand about one foot away from it while recording to pick up a different type of sound.
And lastly, use a condenser mic as a room mic. Put it in a place where it picks up the room sound which will add natural reverb and depth to the violin sound.
Of course, before you start recording, you should test the sound and choose the best mic positions.
Also, if you don’t have all the mics, use whatever you have, and feel free to use different mic combinations, placements, etc.
It’s just my favorite way to record violins at home to achieve the sound I like.
5. Record Various Takes
After you set up everything, test the sound and you are satisfied with it, now it’s time to start recording.
The recording process might be daunting and exhausting because it requires focus and attention to detail.
You want to perform as best as you can and don’t make any mistakes. The recording must be as perfect as possible.
So, because of that, you will need to record various takes and listen to them later to choose the best performance.
Or many times, you might like a specific part from one take and another section from another take.
And that’s why you need to record several takes. It gives you the freedom to choose the best performance. That’s one of the benefits of modern digital recording.
Also, I recommend recording the whole part at once because it will give cohesiveness to the track and it will sound natural and more alive.
Conclusion
As you can see from this guide, it’s not that difficult to record violins and it’s similar to recording other instruments. The most challenging step is the mic placement but with a couple of tests and trials and errors, you will soon understand it and become a more professional recording engineer.