You want to record drums but don’t know how to play. Then you need to use and record VST drums. It’s very easy and everyone can do it.
Instrument plugins allow us to play and record musical instruments we don’t know how to play. And drum plugins are one of them.
Technology has improved and now we have drum plugins that sound very real and can be recorded.
In this beginner-friendly guide, you will learn how to properly record drums with plugins. The ways you can record your drums and also how to make VST drums more realistic.
How To Record VST Drums
You can approach VST drum recording differently. There is no right or wrong way. The goal is to create as realistic and natural-sounding drum sounds as possible.
Because VST drums are not played by a real drummer, if it’s recorded incorrectly, it will not sound real. So, there are different tricks you can do to make your drums more real.
Also, before you start recording, you can choose the method to record your drums. You can use a MIDI keyboard or just create notes on a grid with your mouse.
You can record VST drums with a MIDI keyboard. Different keys on a keyboard are connected to a drum kit and you can play them. This will be more natural but can be tricky for some people.
Or you can create a drum beat with a mouse on a grid. Every VST drums allow you to create notes on a grid with your mouse. So, you can map it out. It’s up to you how you want to record it.
Both methods have their pros and cons. Use the one that suits you. In this guide, you will learn how to record your drums and how to make your instrument sound more real.
1. Choose Your Drum Plugin
The first step to VST drum recording is to choose the right plugin for your project. You need to choose the type of drum and make sure that it has all the features you need.
There are hundreds of different drum plugins for acoustic or electronic drums. A great thing is that you don’t need to pay for it. Because you can find some great-sounding plugins that are free to use.
Also, you have to check what features the plugin offers. A good drum plugin should offer different kits, sounds, presets, settings to tweak, etc. You need to have options to choose from.
So, find the plugin that suits your project and preferences. It’s better to have different kits, sounds, and other goodies.
2. Create Custom Drum Kit
After you choose your dum plugin, you need to create your custom drum kit. Most of the plugins have that option.
But there are simpler plugins that have only one kit. You can use them for simple projects. But it’s better to have the option to create a custom kit for your song.
Plugins like EZdrummer, include different drum kits. But you can customize it as you want. Not only you can choose between different drum kits, but you can also create totally custom ones.
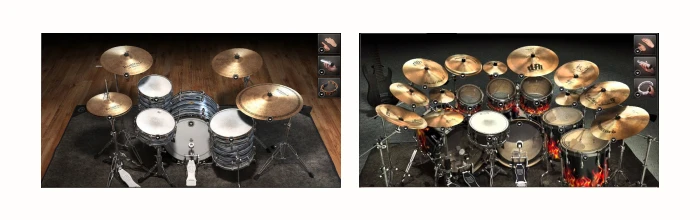
Like many other drum plugins, it allows you to record VST drums with a custom kit. You can choose a different sound for individual instruments such as kick, snare, toms, hi-hat, etc.
Also, you can change the volume level for each kit, pan them, add reverb, etc. You have full control of your kit.
But if you don’t need a custom kit, you can choose from default kits. A good drum plugin will have a couple of pre-made drum kits.
The goal is to have a drum kit before recording. This way you will know how your drum sounds and it will be easier to mix it later.
3. Create A Drum Track
Next, what you want to do is to open a new project in your favorite DAW and add a drum track. It’s simple. Like you add any other audio track. But in some digital audio workstations, the process might be slightly different.
For example, in Reaper, you add an instrument track and then insert the plugin. But it might be different for your DAW. Because you use a VST plugin, it needs to be a MIDI track.
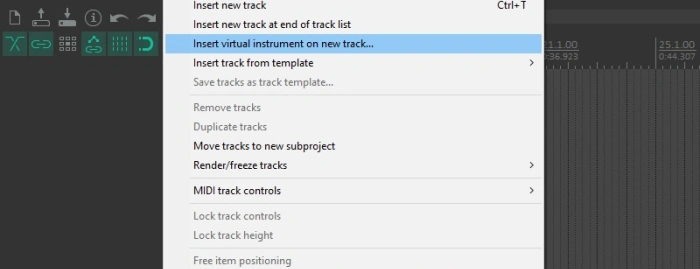
So, create a track for your drums and insert your favorite drum plugin in that track. And it might ask you if you want to create a multi-channel track for your drums. You need to accept it.
You can create one track for your drum and record that way. But in the next step, you will learn what multi-channel drum recording gives you and why it’s better.
4. Split Drum Channels
The reason why you need a multi-channel drum track to record VST drums is to split your drum signal. This allows you to send each kit to a separate channel. This gives you more control and option.
It splits the drums into different channels. Your kick drum, snare, toms, and other kits will be sent to their own channels. This allows you to change volume, and EQ and compress them separately.
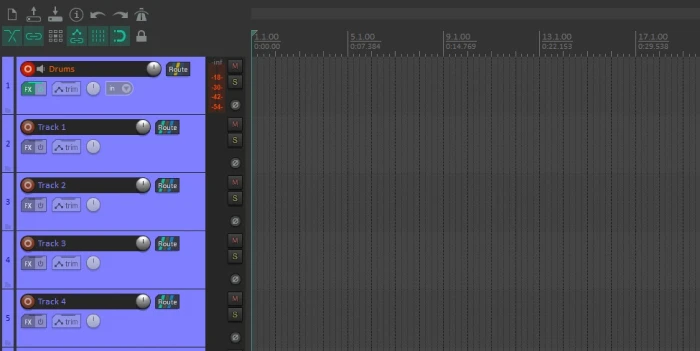
Now you will have multiple tracks. The first one is where the plugin is inserted and the rest will be empty. Now you need to connect each kit to these tracks.
If your drum plugin supports multi-channels, it will have a section for the mixer. It will be separate drum kits with faders, panning, etc. But also, it will have the option to choose a track where you want to send the signal.
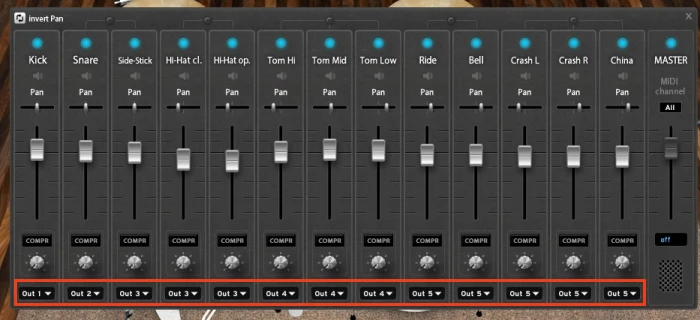
This allows you to send any kit to any track you want. In general, kick, snare, and hi-hat go to separate tracks. And you can group toms and cymbals and send them to their own track.
This gives you the ability to separately control each component of your drum kit. That’s very important for good sound and especially in mixing.
Also, some plugins may have tracks for drum reverb, overheads, etc. You can send them to separate tracks or just don’t use them. It’s up to you.
5. Record Your Drums
You have chosen your kit and created your drum tracks. Now you are ready to record VST drums. And it’s put to you the way you record it. There is no right or wrong way.
As I have explained, you can use a MIDI keyboard to record VST drums, or use your mouse and add notes on the grid.
If you use a MIDI keyboard, you can map your keys the way that they correspond to a different drum kit. For example, C will be a kick drum, C# will be a snare, etc. Then you can press the record button and play your drum part.
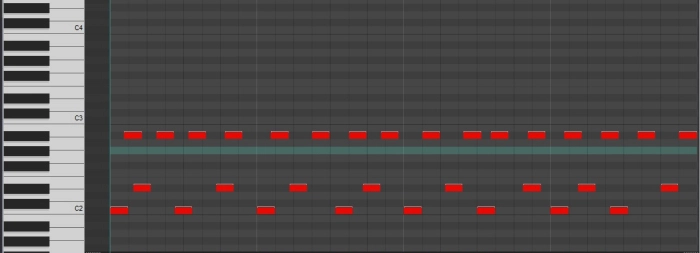
Or you can open the grid and start creating your drum beat with a click on a mouse. Every DAW has a grid option for VST drums. You create a section on the sequencer, open it and add different drum notes to the grid.
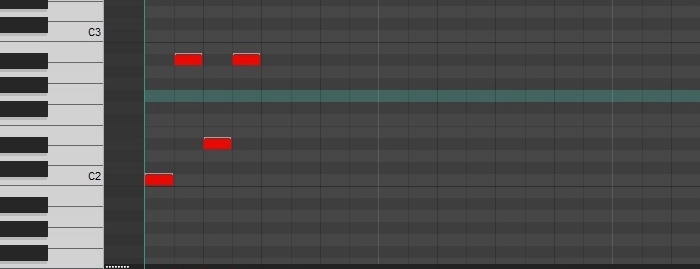
And you don’t need to play the whole part at once. Record it once and then you can copy and paste it where you play the same part.
Whether you record VST drums with a MIDI keyboard or manually create it, you will spend less time. It fast and easy way to create and add drum parts to your songs.
6. Quantize Drums
But now you need to tweak it a little. Depending on the technique you recorded your drums, you will need a different approach. Your drum will sound too perfect or it will have bad timing.
And that’s where quantization comes in handy. Quantization is the process when you align notes to the grid. You try to make them as perfect as possible. Learn more about it here.
If you record VST drums with a MIDI keyboard, most likely it will be out of time. So, you need to correct the notes and align them to the grid. But try to be natural. It’s not necessary to perfectly align it.
Open the recorded drum track and you will see the notes. Most DAWs will have a switch for quantization. Turn it on and try to align notes to the grid. Make it as natural as possible.
But if you didn’t use a MIDI keyboard and created it manually, then drums will be too perfect. Notes will be perfectly on the beat.
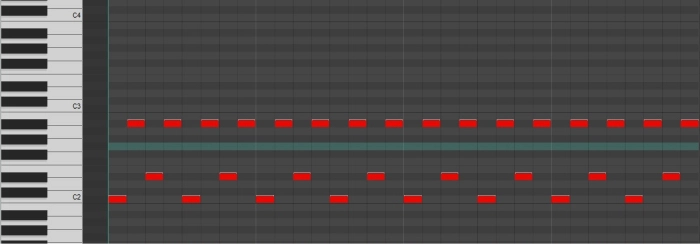
You may leave it like that and most people do. But it’s too perfect. No human can play that perfectly. So, you can slightly adjust the notes and take them a little out of the grid. I mean milliseconds.
It’s not necessary but if you want to create better, more realistic-sounding drums, you can do it. But when you record drums with MIDI keyboards, quantization is a must-do.
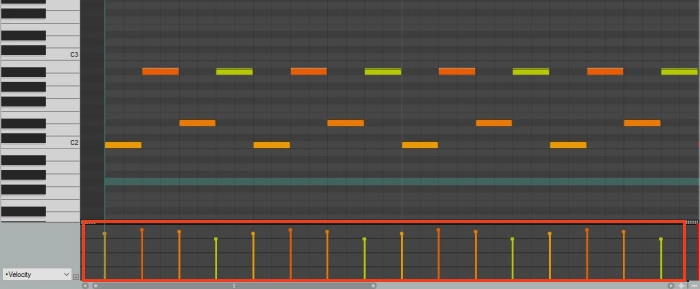
7. Add Velocity
And the key to realistic VST drum sound is velocity. You may record VST drums perfectly and quantize notes but without velocity, it will not sound natural and real. So, this is a very important and time-consuming job to do.
Velocity means how powerful a note is, and how hard you hit it. In a MIDI world, velocity power measures from 0 to 127, where 127 is the hardest and loudest.
A real drummer hits with a different velocity every time. So, it’s natural to do that. But with VST drums, that’s not the case.
When you create your drum part manually, the velocity for every note is 127. So, there is no dynamic, rhythm, or feel. It’s too robotic and dull. There is no groove.
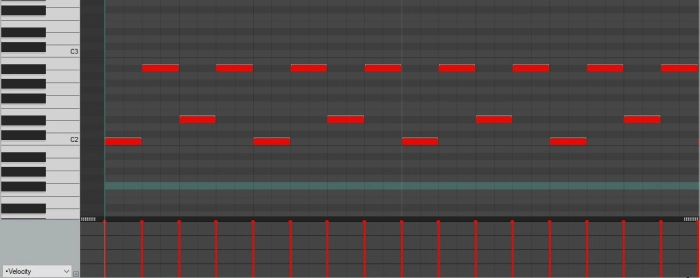
And that’s why you need to use velocity. And you can do it to every MIDI instrument. You can pick a note and change its velocity. Your DAW will have some kind of control for velocity. Use it and make your drum sound more realistic.
But if you record VST drums with a MIDI keyboard, it will be more natural because you hit the key at a different velocity. So, notes will already have a natural feel. But it still needs adjustment.
Although it will have some velocity, it won’t be consistent. So, you need to adjust it. Think about what feel, groove, and rhythm you want and adjust accordingly.
Velocity is the key to the great VST drum sound. Without it, it’s hard to create a realistic-sounding drum with plugins.
But with quantization and velocity, there is the option to make a programmed drum sound realistic and more natural.
Conclusion
If you follow these steps and take your time, you will create great-sounding drum tracks. Just recording VST drums is not enough. You need to choose the plugin, create a kit, record it, and then adjust it.
Quantization and velocity are the keys to realistic drum sounds. You need to start implementing them in your recording process. VST drums are easy to record but challenging to make them sound real.
This beginner’s guide will help you to show how it works and how you can create great-sounding VST drums in your home recording studio.