Mixing a song at your home recording studio can be challenging. You may have low-quality equipment, little experience, an untreated room, etc.
But that is not true. You can create great mixes at your home with minimal equipment and very little experience. You don’t need recording studio-quality gear to mix songs.
You need a decent laptop, DAW, and a couple of plugins to mix your tracks at your home. And I’m here to show you how you can do it.
If you have never mixed a song before, don’t worry. After reading this guide you will have a good understanding of how mixing works, how to do it, and what mistakes you should avoid.
Make Sure The Song Is Ready For Mixing
Mixing is the second part before you finish your song. The first part is recording. So, before you mix a song, of course, you need to have a recording. And a good one.
If you have read the guide about recording a song, then you already know how to record a song and how to balance it to be ready for mixing. But before you start mixing, you have to check your mix again.
Make sure that it’s recorded as you wanted it to be. Also, the recording must be well-played and well-recorded, with no bad parts, and it must be tight. So, you need to have a great recording with great sound. You can’t improve bad sound sources during mixing.
Mixing In Headphones vs Monitors
There is a never-ending debate among mixing engineers. Which one is better for mixing – studio monitors or headphones? We can argue about it but the answer is – both.
In general, studio monitors are better to mix with. They have bigger speakers, frequency response is fuller and more detailed. Also, you hear your music in the context of your room and it affects the sound. It’s more natural.
But good headphones are also great for mixing. I personally have mixed a lot of songs in headphones and the results were great. Everything depends on the quality.
If you have a cheap studio monitor, it’s better to use good-quality headphones. Also, when you have a studio at your home, sometimes it’s more convenient to use headphones.
So, both are good for mixing. Studio monitors are better. But the best solution is to have both. This way you are able to check how your mixes sound in different speakers.
How To Mix A Song
Now, if your song has no problems and you are satisfied with your recording, it’s time to start the mixing session. You will learn how to mix a song in thirteen steps.
1. Listen To The Whole Track
When you begin the mixing process, the initial step is to carefully listen to your song, from its beginning to its end. It is crucial to repeat this step multiple times to ensure a thorough understanding of the composition. By doing so, you will be able to proactively identify and prevent various issues that may arise down the line.
The reason is that you need to know how your song sounds, you must feel it. If you don’t understand your song, you won’t be able to mix it well. Every song requires a different approach because there are no standard rules for mixing.
Listening to a song will give you ideas of how to approach it. And depending on the track or genre, you have to mix every song differently. Also, many engineers use the reference track method but I don’t like that method.
Also, if you make an album and have six or seven songs, you have to listen to each song and make sure that they sound very close to each other. But mixing an album is a different topic. Here we talk about mixing a single song.
When you listen to the whole song, you get used to it, you will get some ideas, and it will make the mixing process easier. Because if you don’t know what you are mixing, you won’t be able to produce great songs.
It may sound boring but you must listen to your song to understand what it is and what it needs.
2. Manage Gain Staging
You listened to your track, understand it, and already have a couple of ideas on how you want to mix it. And it’s time to start the real mixing process. The first step in real mixing is gain staging.
This is one of the most important steps in mixing and this is why it’s number one on this list. Without gain staging, good mixing is impossible. Gain staging is not hard to do but it requires attention.
Gain staging is the process when you balance your instrument volume levels. It needs no plugins or tools. You do it with volume faders. The goal is to create a good, balanced sound mix with headroom for future mastering.
And that’s where the first step comes in handy. Because you have listened to your song, now you know what it needs. So, never skip the first step when you mix a song.
What you need to do during gain staging is to tweak every instrument and vocal volume faders to achieve the desired sound. Balance volumes between all the tracks. Make it sound like you want it to be.
There are various different ways to approach gain staging but I have my favorite one which I use all the time. It’s very simple and you may implement it in your gain staging.
First of all, I always turn off every track. I slide down faders to zero. Then gradually I start to increase every fader one by one until I am satisfied with the sound.
I always start with drums because they are the fundamentals of the song. I slide up the bass drums slowly until it reaches the desired volume. Then snare drums, hi-hat, toms, etc.
Following the drums, the bass takes the stage. This is my opportune moment to fine-tune the lows and ensure a harmonious blend. As the drums set the rhythm, I gradually augment the bass volume until I attain the desired satisfaction, achieving a well-balanced fusion of drums and bass.
After drums and bass, it’s time for guitars. First I increase the rhythm guitars and after that any additional guitars if there are one. This might be a lead guitar, fill, harmony, or something similar.
So, I continue this process and finish it with vocals. I always do vocals last. Because I need the music to be balanced and good. After you have good music, you can blend vocals. Start with the main vocals tracks and then add backing or other vocals.
The goal is to have a balanced sound. Every instrument should have its place in the mix and it changes from song to song. But don’t increase your instruments too much because it will cause sound clipping. And it’s bad.
But what’s more important is to have an eye on the master bus. You may balance every instrument but because all these instruments go to the master bus, it may start clipping. You don’t want it to happen. You need to leave headroom for the mix to breathe. Also, headroom is critical for mastering.
So, make sure that there is at least 6dB headroom on the master bus. I like when the RMS of the master bus is about -6dB to -8dB. But don’t move the master bus fader. It must stay untouched.
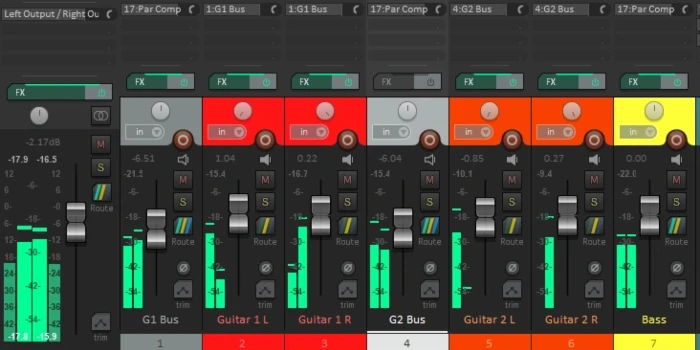
3. Pan Instruments
Instrument panning is the next step in mixing and a very important one. If you do a good gain staging and panning, you can say that you made 60% of your mix. The other 40% is EQ, compressor, and effects. When you mix a song, always think about instrument panning.
Let me explain what panning means. When you record your tracks, all the tracks are in the center. So, you have a mono recording. And to make it stereo you need to pan them to both sides.
Every DAW has a little pan knob. By default, they are in the center and you can move them right or left. Most of the DAWs measure panning in percentage. For example, 100% pan means that you will hear that instrument only in one speaker, 50% means halfway panning, and so on. 0% is the center.

And that’s the panning process. You pan your instruments and vocals on both sides or leave them in the center. And there is a common way of panning instruments. I’m here to explain it.
For example, rhythm guitars go all the way to the sides. This is called hard panning. One guitar goes 100% left, and another 100% right. This is very common in metal music or heavy music in general. But you can pan them 75% or anything you feel sounds right. But 100% is very common.
Bass, vocals, and kick drum stay at the center because you need a punch of bass and bass drum, they should stay at the center of the stereo spectrum. Additional vocals can go on sides but hard panning is not required.
There are differing preferences when it comes to drum placement, with some individuals favoring a centered arrangement, while others appreciate slight panning effects with the drums. Visualize yourself as the listener, gazing at the drums. The snare, for instance, is positioned slightly to the right, while the hi-hat leans more towards the right side. On the other hand, the floor toms are located on the left, and so forth.
So, you can pan them the exact same way. For example, you can pan snare drum to the right side about 10%, hi-hat to about 15%, floor toms to 15-20% left side, and so on. You can experiment with it. It’s your song and what sounds the best for you, it’s the best way to pan.
You can pan different instruments on the sides or leave them in the center. It all depends on how many instruments are on the track and what you want to do with them. There are no rules in mixing. Just some common practices from many years of experience.
4. Prepare Track For Mixing
This step is not very common among mixing engineers. I have seen very few people who do it but I like this method. I call it the preparation for mixing. And it’s a very easy thing to do. I always do it when I mix a song.
This is what I do. Before I start applying EQ and compressor on tracks and start mixing, I insert EQ plugins on every track and do just subtle HPF and LPF. In other words, I cut very highs and lows of every track. Depending on the instrument, frequencies are different.
Just cut the unnecessary frequencies. We don’t need them. They make the whole mix muddy. Just use whatever plugin you feel comfortable with and do simple high and low cuts. And then listen to your track.
This way I hear how my mix sounds without unnecessary frequencies. It becomes clearer. Also, this way I find which instrument needs more EQ tweaks, which needs less, and some instruments don’t even require EQ.
So, before I start real mixing, I want to remove bad frequencies and hear my song. It gives me a better picture of my song and what needs to be done.
This is my personal mixing trick and you can use it or skip it and start traditional mixing right away.
Also, don’t mix in solo. Because when you mix in solo you may dial a great bass tone but as soon as you turn the whole mix, it may not sound good. So, always mix in the context of a song.
However, it is a good idea to check your instruments solo. Perhaps you will find some bad frequencies and edit them. So, sometimes check in solo but mix in the content of the whole track.
5. Start Mixing With Drums
Start your mixing with drums because you need to create a strong foundation for your song. Drums must be strong and punchy. Drums give power to songs.
Start with the bass drum because it is the source of low-end, punch, and must sit well with the bass. After that mix the snare drum, hi-hat, toms, and lastly the cymbals.
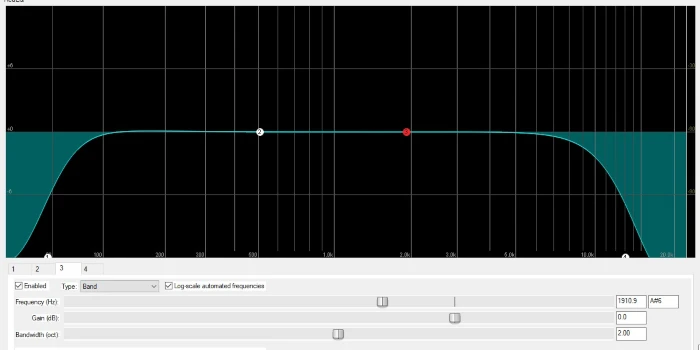
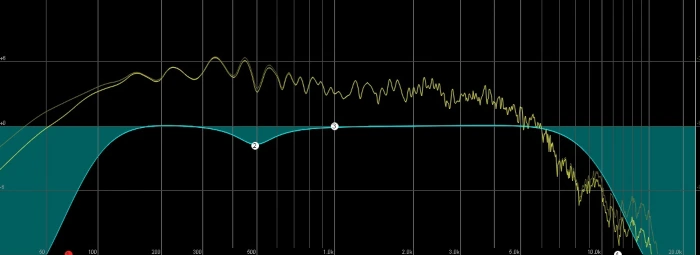
If you do the previous step, you already have an EQ on the track with LPF and HPF on. Now you need to start cutting unnecessary frequencies and boosting the frequencies that give the instrument its sound.
First, start by cutting. Find the frequency that is bad or makes the sound muddy and cut it. This way you preserve the original sound, just cutting the wrong frequencies.
After cutting, start boosting the right, juicy frequencies. In general, cuts should have a narrow curve, and boosts should be wider. You can do it with the Q control.
Simultaneously, you listen to the whole mix and detect changes. So, don’t do dramatic changes to your EQ. Listen carefully and you will find the best spot for cuts and boosts.
When you mix a song the goal is to preserve the original tone of the instrument by cutting the wrong frequencies and boosting the good ones.
6. Mix Bass Guitar
After drums, you need to mix bass guitar. These two instruments create the low, punch, and power of the track. So, you need drums and bass to be as tight as possible.
You mix the bass the same way you do drums. Apply EQ and then the compressor. Also, you can add some kind of saturation if you want the bass to have a little distortion. It also helps the bass to cut in the mix.
You can record and mix bass in several ways. For example, you may have two bass tracks – one with the amps sound and another just a bass DI track. The approach will be different in every case.
The bass amp sound will be your main track and you can use only low frequencies from the DI track. Just cut mids and highs and leave only low frequencies on the DI track. But you have to cut the exact low ends from the bass amp track.
Now you are able to control low frequencies separately. Then you blend the two bass tracks and make it one. You can create a separate bus track for basses and send both bass signals to it. Then you can control the volume of both bases together.
Some people like to have three bass tracks. One bass amps track and two DIs. They use one DI for lows and another for only highs. They have control of lows and highs. After mixing you can send all tracks to a bus track and use it as one bass track.
There are many other ways for bass when you mix a song. You can use any of them. You can have one bass track, two bass tracks, or even three separate tracks for bass.
7. Mix Rhythm Guitars
Now it’s time to mix rhythm guitars which is a very important step. Your guitars must be big and powerful. With drums and bass, you created punch, power, and low end. It’s time to add more energy and the power of mid-range to your track.
Like with bass, you can mix guitars in many different ways. There are no rules. Each song needs distinct methods. Also, a different approach is needed for clean guitar and heavy guitar tones.
You have your guitars hard-panned to the sides. Now you can mix both guitars separately. Cut unnecessary lows and highs and bring up juicy frequencies. In general, guitars need cuts around 500Hz. This section sounds boxy.
Also, you can boost frequencies from 1K to 3K. But depending on your sound, it may vary. So, listen carefully to your guitars and make good decisions. Find the juicy section of your guitars and boost them.
Another thing you can do when you mix a song is to create a bus track and send both guitars to that track. Now you can treat both guitars as one. If guitars are well-recorded with great sound, you don’t need to mix them separately. Just send them to the bus and mix them there.
You can do some minor EQ tweaks separately but do the main mixing on the guitar bus track.
Also, remember that heavy guitars don’t require a compressor. The heavy guitar tone is already compressed. If you add a compressor to heavy guitar, it will squash it.
But you can add a compressor on a clean electric guitar or acoustic guitar. But you don’t need much compression. Just subtle will be enough.
After you mix your guitars, they will fill the mid-range and your song will become fuller and more powerful.
8. Mix Other Instruments And Overdub
After you mix all the main instruments and have the meat of your sound ready, it’s time to mix other instruments and overdubs. Some instruments will need more mixing than others.
To mix a song completely, you don’t need to use EQ and a compressor on every track. Some tracks don’t require any mixing at all. If it sits in the mix, just leave it. Because EQ or compressor may ruin the sound of that particular instrument.
This time you can mix piano, synths, or any additional instruments you have. Also, if you have any overdubs, harmonies, or lead guitar, you can mix them now. But try to not change the whole sound dramatically.
These instruments are complementary to the sound. They can add some flavor to your song. So, no dramatic and surgical mixing is required.
9. Mix Vocals

And the last and very important track when you mix a song is the vocal track. It’s the last missing piece of your song. First, mix the main vocals, then mix backing vocals or harmonies.
Mixing vocals is a very delicate task to do. Vocals must be well sung and recorded in order to sound good. You just need to make it more awesome and powerful.
The goal is to make it consistent. It must have power. So, with EQ you need to cut all the bad and muddy frequencies and bring up the juice of the vocals. Give it the power it needs.
The compressor is more important in vocals than EQ. Well-recorded vocal needs very few EQ tweaks but because vocals are very dynamic, it needs good compression. Not too much but good.
Vocals must be consistent, even, and powerful. And you can do it with the power of the compressor. Whether it’s a compressor plugin or an analog compressor.
Vocals must not be lost in the mix. You can hear them and hear them well. If you hear vocals on some parts but on other sections it’s lost, there is a problem that needs a solution. And this solution is the compressor.
After mixing the min vocals, then mix additional vocal tracks.
Also, blending is very important with vocals. If you have a double vocal, these must be very tight. Your main and double vocals must sound like one. Double vocal helps it to be powerful and vocals cut in the mix better.
Also, volume leveling is very important when you blend different vocal tracks. Balance is everything.
10. Listen Again And Make Minor Edits
Now it’s the best time to listen to your track and make final changes. Because if you miss the mistake now, it will be late for changes.
Just listen to the whole track a couple of times and try to find anything you don’t like and feel that needs some correction.
It may be a frequency issue, too much compressor that makes the sound very unnatural, instruments that don’t sit well in a mix, etc.
You are free here. Find anything you don’t like and fix it. This is the best time to make final edits to your song.
Also, it’s a good idea to listen to your mix with different speakers. Try different studio monitors, headphones, cars, etc. It may sound great in your studio, but not so great in the car. Perhaps you don’t hear the bass in headphones but in the car, it’s loud.
Return to your studio and make changes. Repeat the process until you make it sound great in every environment. Checking the final result is important when you mix a song.
11. Add Effects
Now you have a complete mix. You like it. And it’s time to add effects to your tracks. You can do this when you mix the individual tracks, but then if you don’t do something, it’s very hard to make corrections when effects are applied on the track.
In effects, I mean reverb, delay, saturation, or any other effects that make the sound better. Your mix already sounds great but it needs additional, subtle flavor.
Use reverb to add space to your instruments, vocals, and whole track. Saturation adds distortion and helps it to better cut in the mix.
For example, reverb makes drums alive and spacious. Also, you can use effects such as flanger, phaser, or anything you feel is right.
Don’t add effect until you check your final mix. Corrections will be harder. Add effects after you make final edits to your mix.
12. Cosmetic Mixing On Master Bus
When mixing a song, it is crucial to make adjustments to the master bus. All individual tracks are routed to the master bus, which ultimately delivers the sound through the speakers. Consequently, the master bus holds significant importance in the overall mix. However, extensive modifications are not necessary, as subtle tweaks can suffice.
First, add an EQ and make very little, few subtle changes to it. Maybe there is a build-up in lows or very harsh high frequencies. Using EQ you can cut them. But very subtle cuts. About 1 to 2dB cut or boost.
In the same way, you can use a compressor. Very subtle changes to make your whole track more cohesive and even. It will glue your mix together. Sometimes you don’t even add anything to the master bus. If it sounds great, don’t do anything.
No other plugin is required for the master bus. Just EQ and compressor. And do very few changes. One wrong turn of the knob may ruin everything.
And finally, make sure you have the headroom on the master bus. The meter should be about -6dB to -8dB. You will be sure that there will be no headroom issues in mastering.
13. Export The Mix
And the very final step in mixing is to export your song for mastering. It’s not hard to do but there are a couple of things you should know.
You must export the song at the same sample rate you recorded it. Most people record and mix in 44.1 kHz. So, if you recorded at that sample rate, export at 44.1 kHz. And it must be in WAV format. Don’t export your mix in MP3.
Nex is the dither. Dither is the low-level noise that’s on an audio file. So, while exporting, there will be a dither checkmark. If you export 32-bit audio, you don’t need to check dithering. But if your file is 24-bit or 16-bit, applying dithering is common practice.
Modern DAWs already have the best quality exporting settings. So, there is a small chance that you will export your files incorrectly. But it’s good to know how to export your song correctly.
Conclusion
Mixing is a very important part of song-making. It’s not easy but it’s not hard either. You need practice and experience. To mix a song at your home studio is not a hard thing anymore. You have every tool you need to record and release your song from your home. You need a laptop, DAW, and some plugins and you are ready to make records in your home studio.
You need to record your song and follow these mixing steps to make great songs. Also, there are several mixing mistakes you need to avoid. After the mixing, there is the final step which is the song mastering.