In this digital era, you have the luxury to record a song at your home. You need a laptop, DAW, and some VST plugins and you are good to go. And everybody can do it.
There are many free and premium plugins and tools that help you to create tracks at your home studio. You can create records without instruments too.
Although creating songs is very accessible, you have to know how to record a song. What equipment to use, how to prepare for recording, how to record properly, and so on.
And I am here to explain everything.
Before You Record A Song
There are a couple of things you have to know before you start recording. There is a list of equipment you need for recording a song at your home. And of course, you need to have a song structure before you start recording.
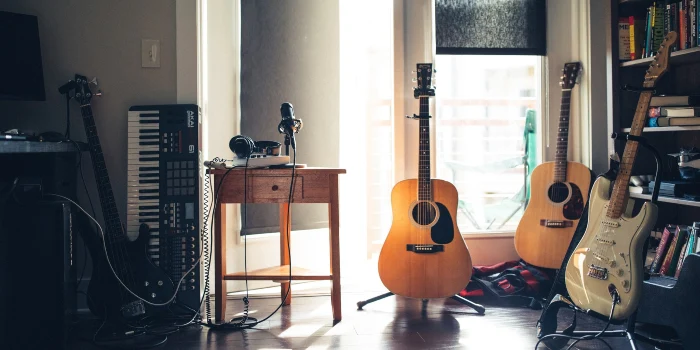
First, you will need some instruments for recording. It may be a guitar, bass, keyboard, or anything else. Although depending on the music genre, you can record music without any instruments and use VST plugins for that. But some genres such as rock or metal require real instruments.
Also, it’s better to have some kind of MIDI keyboard. With a MIDI keyboard, you can play and record VST instruments like drums, pianos, violins, synths, etc. Also, you can use it as a DAW controller.
Next, you need a laptop or a PC. You don’t need a high-performance computer because most modern computers can handle music recording software. Make sure that it has multiple cores and 8GB of RAM is recommended. Also, a decent amount of space on a drive.
The third piece of equipment you need is a DAW. Digital Audio Workstation is software where you record your song. There are many great pros and free DAWs you can use at your home studio. Every DAW does the same thing. So, get the one you like the most.
Other things you need to record a song are cables for instruments, headphones, additional plugins, and things like that. Also, at least one microphone to record vocals. And if you plan to record guitar or bass amps or an acoustic guitar, you may need additional mics for better tones.
Now you are ready to start recording songs at your home recording studio.
How To Record A Song At Home
In this step-by-step guide, I will explain how to record a song at your home from start to finish. There are a total of eleven steps. So, follow them and you will be able to start recording immediately.
1. Prepare Your Gear
The first step before you start recording is to prepare your gear. You need to have everything in place before the recording session because you don’t need any distractions. You have to be ready to record.
Change strings on guitars and bass, and make sure they are in tune. If you use real or electronic drums, make sure they are set up correctly. If you use real amps, check if the theory has any problems.
Also, check microphones, cables, headphones, etc. Everything must be in working condition. Additionally, prepare all the plugins and DAW you are going to use.
To ensure a smooth recording session, it is essential to have your equipment and studio prepared beforehand. Take precautions to eliminate any potential issues that may arise during the recording process.
2. Set Up A Recording Environment
The next step is to create a recording environment. You need to connect everything before you record a song. If you miss something, it won’t work.
If you use an audio interface, connect it to your PC, configure audio in your DAW, and make sure the signal is coming through. If you use guitar pedals, they also must be working. Check if you hear a sound in your headphones.
After you will be sure that everything works, the sound goes to DAW, you hear output, plugins work, and so on, and you can go to the next step.
3. Start A Project In Your DAW
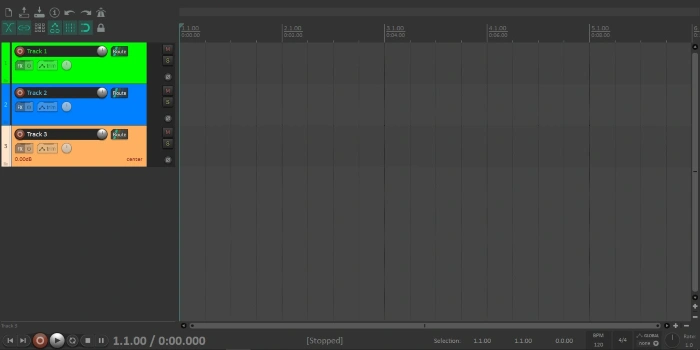
Now it’s time to set up a project in your DAW before you start recording. Setting up a project makes the recording process easier. And it takes just a couple of minutes to do it.
What you need to do is create a template for your song. Add all the main instrument, vocal, or MIDI tracks you plan to record and you will add additional tracks later. Insert all the VST plugins you plan to use except compressor and EQ.
Also, it is very important to add drum tracks. If you use VST drums, add the plugin, create all the tracks for the snare drum, bass drum, cymbals, and highest, and connect to it. The same goes for the real drums.
Lastly, check again if the signal goes to your DAW. And this is the time to set up levels. Just play different instruments and make sure that the levels are correct. Avoid clipping and try to leave headroom for instruments to breathe.
In a nutshell, create a template for your song – add instruments, check levels, and you are ready to record a song.
4. Create Good Instrument Sounds
A very important step is to create sounds and tones for your instruments. You can do it earlier but this is a great time too. If you don’t have a good sound for each instrument, you can’t create great songs. Also, it will cause problems during mixing.
Dial the guitar and bass tones you want to have. If you use real guitar amps and effect pedals, remember it or write settings on the paper. But if you use guitar amp sims, save tones as presets so, you won’t lose your sound.
This concerns every instrument, whether it be a real or MIDI instrument. Especially the main instruments like guitars, bass, drums, etc. You need to have a good tone for your song to sound good.
Also, a good idea is to record some demo sections with all the instruments, listen to them, and understand how it sounds. Maybe you have great instrument tones separately, but together they don’t sound good.
This is the time to edit and dial tones that work great together. If you miss this, you will have to record them again later. Because a bad tone can’t be fixed in mixing. So, to avoid problems, do this before you go to the next step.
5. Record Drum Tracks
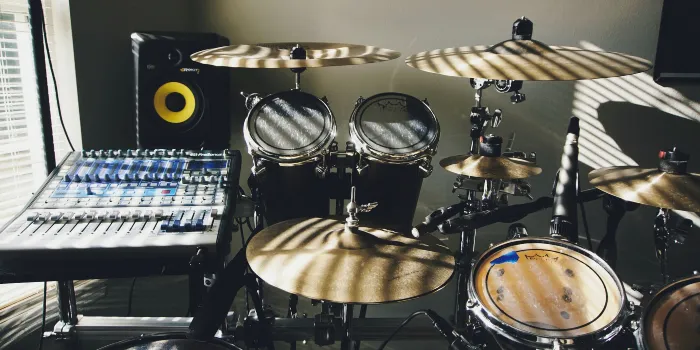
It’s time to start recording a song and the first instrument you should record is the drums because drums are the foundation for every song, you need to record them first. Of course, this is the case if you record instruments separately.
If you record the whole band in an old-fashioned way, then you plug in every instrument, press record, and play the whole song. But that’s very rare in a home recording studio case.
If you record real or electronic drums, make sure that you play as well as you can. Playing must be great and on time. Like tone, playing is also critical for great mixes. If a part is not well-recorded, then there is no chance that the mix will sound good.
But if you record VST drums, make sure it doesn’t sound robotic. Make hit-level adjustments, and create the feel and dynamic. Today’s drum plugins have the ability to sound more natural and near real performance.
In simple words, you have to play the best possible way you can. Of course, you can edit little sections later, but the whole recording must be well-played.
And also, a very important thing is to record the whole track. Don’t play and record parts separately. Record them in their entirety. And this concerns every instrument. Not only drums.
6. Record Rhythm Guitars
After you record your drums, it is time to record rhythm guitars. Some people prefer to record bass after drums, and that’s great. But I like to record bass after drums and guitars. I just feel comfortable in this way.
Like drums, guitars must be well-played, as tight as you can do, and you have to record the whole track in one sitting. Change incorrectly recorded parts later.
And always double-track your rhythm guitars. It’s when you record the same part twice with different tones. Change something in one guitar’s tone. It may be a different guitar, amp, or setting – they must be different from each other and sit well in the mix.
And the recording must be as tight as it could be. You have to make your two guitars one sound. And if your playing is tight and guitar tones sit well with each other, you will get a big, fuller sound.
However, it’s crucial to note that you should never duplicate the guitar track. Instead, you need to perform it twice. Duplicating the initial guitar track would result in an identical sound, only louder, creating a mono effect.
When you record the same riff with different sounds separately, it creates rich sounds, harmonics, and stereo images. You will get a huge and full sound.
7. Record Bass Guitar
Bass guitar recording is very critical in every genre of music. It must have a good tone, must be tight, and sit well with drums. Especially with the bass drum.
Bass and drums give songs power, tightness, and low end. So, your bass playing should be on par when you record a song.
And there are different ways to record bass guitar and my favorite way is to use the VST plugin. I don’t like to record bass and guitars with VST. I like to play them myself.
Then you have to decide how you want to record them – with a real amp and mic or with a bass amp sim. This concerns guitars too, but most of the time in a home recording environment, we use amp sims.
No matter how you record it, you should also record the bass sound and DI bass. DI signal is when you record bass or guitar without any effects. It’s just the pure bass tone. The signal doesn’t go in amp or effect. It comes from the bass straight to the DAW.
In this case, you will have two tracks. One with the amp sound, and one clean bass sound. This is good for different reasons. It can come in handy later in mixing.
The first case is when you don’t like your bass tone. You can add any bass amp sim to the DI track and dial the tone you want. Or, while mixing, you can mix your bass amp track differently, and use the DI track only for the low end. This is a very popular mixing trick.
8. Add Additional Instruments
Now you have 50% of the track recorded. It’s time to add different, minor instruments. It can be keyboards, stringed instruments, synths, lead guitars, or anything you want to have in your song.
Perhaps the piano is the main instrument in your song. Then record the piano first and after that add other filler instruments. Most of the time these are VST instruments.
But if you use real instruments, of course, you have to play them well like drums, guitars, and bass. With VST instruments it’s easier to record because you can quantize them and there will be no timing issues.
Also, at this moment, you may think of a sound you have not considered. So, add different parts and make experiments. Test them, leave what you like, and delete what is not necessary.
Because sometimes there is a moment when you thought a particular instrument or sound would be great. But it turns out that it doesn’t work. This is the best time to do it.
9. Record Vocals
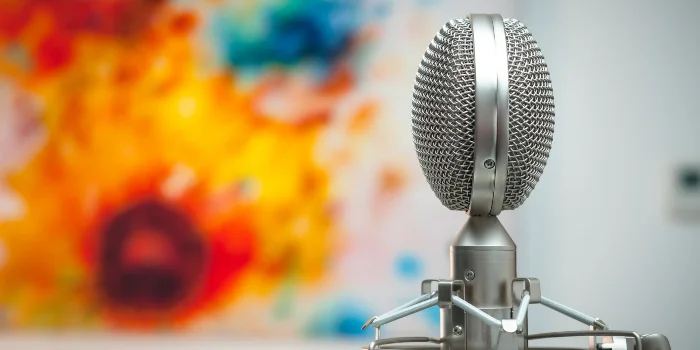
And after you record all the instruments, it’s time to record vocals. Of course, if your track is instrumental, you skip this step.
Vocals are very important and perhaps it will take the most time. Playing well can be hard but good singing is another world. Also, you have to record vocal doubles, harmony parts, etc. It’s a hard thing to do.
First, when you record a song, you need to record the main vocals. Make sure it’s well sung and sing the whole song. And after that add vocal doubles and harmonies.
You may also have backing vocals. But every additional vocal part comes after the main vocal part. Make sure that vocal doubles are tight and powerful.
Also, it’s important that you don’t use any effects such as reverb or anything during the recording session. You will do that in a mixing session.
10. Add Overdubs And Harmonies
After you record drums, guitars, bass, vocals, and additional instruments now it’s time to add overdubs and harmonies.
If you haven’t recorded vocal harmonies and backing vocals already, you can do it now.
First, listen to your song and find out which instrument needs overdubs. Maybe it’s guitar, or maybe it’s piano. Whatever it is, add an overdub.
It will make the instrument more powerful and fuller. Always try to use different tones for overdubs.
Also, this is a great time to add harmonies to your instruments. Perhaps you have a guitar lick that needs a harmonious counterpart. Or any other instrument.
Because your whole song is recorded and you have an idea of how it sounds. If an instrument lacks something or sounds weak, overdubs and harmonies are a great way to make them alive and diverse.
11. Make Final Edits
And the last step to recording a song is to make final changes and edits. It’s hard and exhausting to record a song. So, you may have tried your best but made some mistakes. That’s not a problem because you can fix them.
Listen to your track a couple of times. Find issues and remember or take notes. If you find out that a track has several issues or bad parts, it’s better to delete it and record them again. Try it to be good this time.
But if a track has a couple of minor mistakes, you don’t have to re-record it. Just record the bad part again. It will save you a lot of time. But make sure that it’s natural. You don’t need chopped parts. It must be natural and well-played.
Do this until you are satisfied. But to avoid many edits and changes, record well from the start. But it doesn’t matter how well you record your song, always check it at the end. You might have made a mistake and you don’t want to miss it.
Conclusion
Recording a song at your home recording studio is easy these days. You need simple gear, a laptop, DAW, and a couple of plugins. You can plug your instruments into the audio interface, connect them to your DAW and you are ready to go. But it requires hard work and a little knowledge. Experience comes from practice.