If you are struggling to EQ kick drum to get a good sound then you came to the right place.
Having a good kick drum mix, along with bass, helps your songs to have a full and powerful yet clean low end which is important for every song.
In this simple yet useful guide, I will explain how to EQ kick drum properly and you will understand how it works in general.
EQing Kick Drum In 6 Steps
Here I will show the method of EQing drums I implement on all my projects. And for a better understanding of kick drum EQ, I suggest reading the EQ cheat sheet for drums.
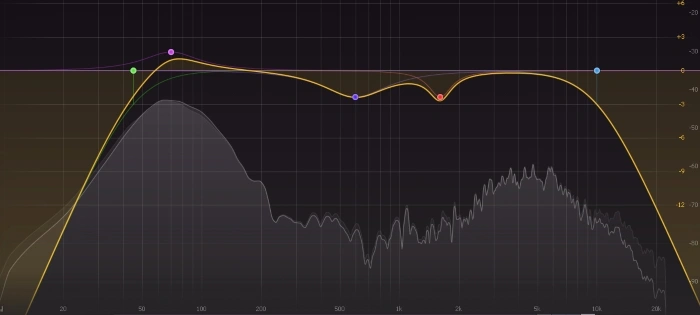
1. Cut Low Frequencies
You should always start the EQing kick drum or any other instrument by cutting very low frequencies that cause the rumble and muddiness.
For this, we use a type of EQ band called a high pass filter (HPF), which allows us to almost completely remove desired frequencies.
And the frequencies you need to cut are different from kick to kick but typically, it’s between 40-60Hz.
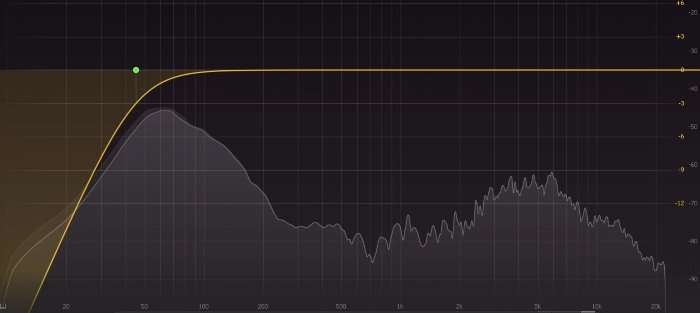
Frequencies below this point are excessive and you don’t need them however, listen carefully to your kick drum because you might want to cut more or less.
As for EQ band settings go, mostly I use a -12dB slope and default Q value because I want the cut to be organic.
2. Cut High Frequencies
The next step when you mix the kick drum with EQ is to cut very high frequencies with the same method, but now you must use a low pass filter (LPF) for that.
You can cut frequencies above 10kHz in most cases and it is my starting point. The Q settings are the same as for HPF.
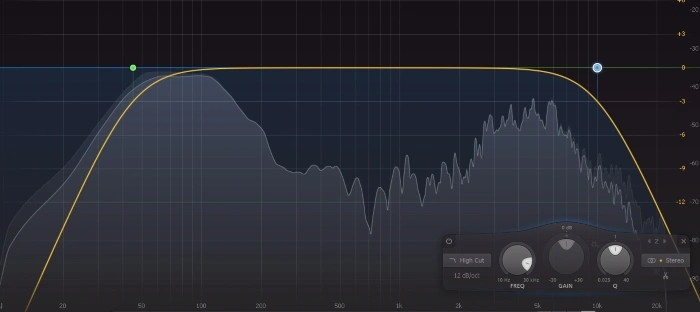
However, this also depends on the type of kick drum, playing style, or even drum recording technique.
Also, it’s important to mention that, EQing acoustic and electronic drums will be very different. And each might need different approach and EQ settings.
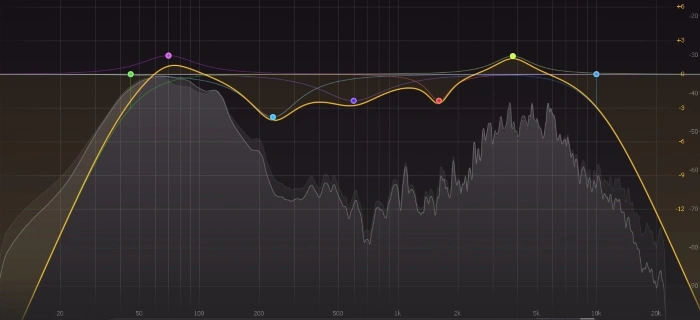
3. Remove Unwanted Kick Drum Frequencies
After you remove all the high and low frequencies, it’s time to cut some additional drum frequencies.
If you have dialed in a good sound during recording drums, it will be much easier to mix drums. But there still be some bad frequencies that need to be cut.
The best way to find these kinds of frequencies is to create a narrow EQ band, crank it up and sweep around the frequency spectrum.
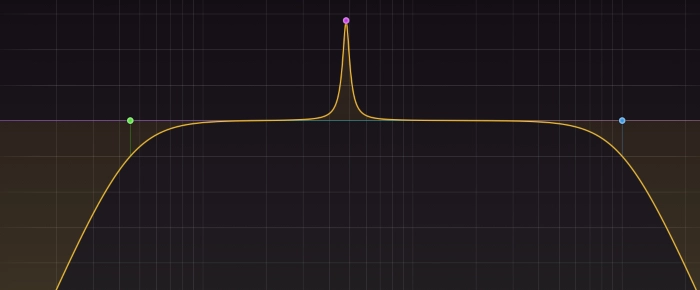
In general, you need to aim frequency range between 200Hz and 2kHz but again, depending on the bass drum sound, it might be different for you.
I typically search for frequencies I want to remove in that area and make two to four cuts.
And I don’t do heavy frequency cutting – mostly between -2dB to -4dB and sometimes Q values are narrow and sometimes a little wider.
4. Avoid Frequency Clash With Bass Guitar
The next step is to bring up good frequencies of a bass drum but before that, you must know one important thing.
Bass guitars and kick drums share some fundamental frequencies and you should avoid the frequency clash.
Some fundamental frequencies for both instruments live between 80-200Hz, so when you EQ the kick drum, always listen to the bass and see where they overlap.
For that, you can use the side chain feature that will allow you to see the frequencies of both instruments and where they overlap. Most modern EQ plugins have that feature.
I like to boost the kick drum below 80Hz and boost the bass guitar between 80Hz and 120Hz.
So, you need to make decisions about which frequency to cut and which to boost for each instrument so they both retain fundamental sound.
5. Add Click To Kick Drum
Now, let’s continue to EQ the kick drum and add some clicking sound to it. However, this might not be the sound you are looking for and that’s fine.
Sometimes you want to have a bass drum click but sometimes not. It depends on the genre, drum playing style, and overall feel you want to create.
Also, some microphones for recording drums might pick up the click but some do not.
But if you want to add it to the kick drum sound look around 3kHz to 5kHz where the click and attack of a bass drum lives.
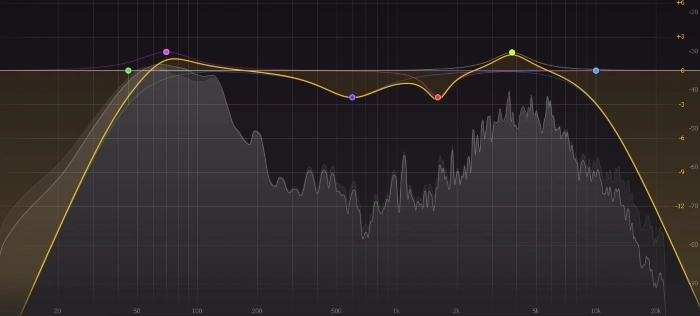
Of course, this range is very general but it’s a good place to start and see if you find the right spot.
Also, try to go above 5kHz and you might find better frequencies there but don’t boost too much – about 3dB will be enough.
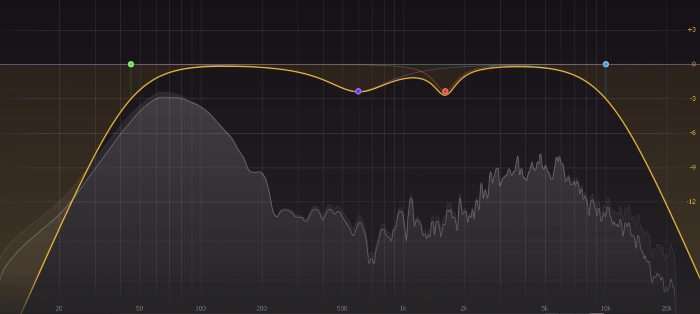
6. Enhance Kick Drum Presence
You might use the best acoustic drum set to record the sound you wanted but it still lacks some presence.
Not only a bass drum but a whole drum kit needs presence because it adds more power and helps to cut in the mix much better.
And you can do this in two different ways – one is to boost high frequencies and the second is to cut some low to low mid frequencies.
For example, for this particular kick sound, I did about -4dB cut around 230Hz instead of boosting in a higher register.
I know that it’s very specific and it might look wrong, but this is the sound I liked and did these EQ cuts and boosts.
The goal is to create the sound you want and record it and then mix it the way you like it.
Conclusion
So, when I EQ kick drums, this is my approach but many times I do various things and use different techniques. But this is the main framework I work with when EQing a kick drum. Feel free to use it as a guide and try to implement different details in your mixing process.